July 25, 2023
Master Mixology: Viscosity Rainbow Shots
In this episode, we explore the science of viscosity before making colorful rainbow shots. In the content below the video, find more details and recipes included in this episode.
Welcome back to Master Mixology with Discovery Place Science! This video series explores the intersection of science, history and alcohol, plus fun adult beverage demonstrations.
In this episode, we explore the science of viscosity before making colorful rainbow shots. In the content below the video, find more details and recipes included in this episode.
What Is Viscosity?
These colorful shots are all about viscosity, or fluid density! A fluid’s viscosity is a measure of its resistance to deformation and can be impacted by factors such as temperature, pressure and time.
Did you know? At room temperature, syrup is much thicker than water, which means it has a higher viscosity.
How Is Viscosity Measured?
Without a special device like a viscometer to measure a liquid’s viscosity, it’s important to consider the properties of your liquid and determine the presence of inter-particle forces within the solution (like friction and attraction between molecules). The more sugar within a liquid, the more friction and resistance to deformation it’s going to have.
Experiment at Home
You can easily experiment with your liquids to identify levels of viscosity. The thicker, high-viscosity liquids will always sink to the bottom and lighter ones will float to the top.
Did you know? This explains the sunset color effect you see with a Mai Tai cocktail. The drink is built in stages and in many versions of the recipe, it gets topped with grenadine at the end. Of all the liquids mixed in the Mai Tai, grenadine has the highest viscosity and slowly sinks through the other liquids to the bottom.
Rainbow Shots
- 8 shot glasses
- 3 pint glasses
- Stirring spoon
- Small pitcher/extra large shaker
- Beverage strainer
- Ice
- 3/4 oz grenadine
- 3/4 oz vodka
- 1 oz tequila
- 3/4 oz lemon juice
- 2 1/2 oz orange juice
- 2 oz rum
- 1/2 oz blue curacao
Preparation
Pour the colored layers into separate pint glasses until you are ready for the final pour. Stir each layer well with the stirring spoon.
Pint Glass #1 (red layer):
- 3/4 oz grenadine
- 3/4 oz vodka
Pint Glass #2 (yellow layer):
- 1 oz tequila
- 1/2 oz lemon juice
- 2 1/2 oz orange juice
Pint Glass #3 (blue layer):
- 2 oz rum
- 1/4 oz lemon juice
- 1/2 oz blue curacao
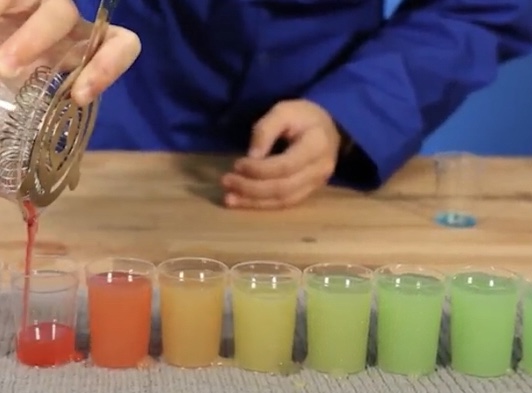
The Final Pour
- Line up your 8 shot glasses before you mix all the ingredients together.
- In your mixer, pour in the red layer first.
- Top that layer with a lot of ice.
- Next, pour in the yellow layer. The red layer has higher viscosity and the yellow shouldn’t sink below it, but it’s a good idea to do these steps as quickly as possible. You may want to add another layer of ice on top of the yellow layer if the ice has melted.
- Next, pour in the blue layer. Once you pour this layer, immediately put your strainer on and begin pouring the mixture into shot glasses. The secret to mastering this trick is moving quickly.
It may take some trial and error to get the rainbow right, but practice makes perfect!
Want more Master Mixology? Check out our previous episode, Moscato Sangria.